Creating a Simple Structure In GID
This section will describe how to create a simple structure, the
planar cell, in GID. Firstly you must ensure the GID problem type
has been placed in the main GID directory.
GID Notes
The initial viewport is odd in GID I usually change the setting
to the following
1) Utilities -> Graphical ->Perspective
2) Tick ‘Axonometric Perspective’
3) Move the slider to about -0.6
4) Click ‘Accept’ and then ‘Close’
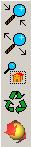
Here is a description of some of the items on the left hand menu
Creating the points, surfaces and volumes
Now the structure can be entered into GID. All structures should
be defined starting at the origin, and extending in the positive
x, y and z direction.
Create the points:
1) Geometry -> Create -> Point
2) Type “point 0,0,0” then enter
3) Type “xMax,0,0” then enter
4) Type “0,yMax,0” then enter
5) Type “xMax,yMax,0” then enter
6) Type “0,0,zMax” then enter
7) Type “xMax,0,zMax” then enter
8) Type “0,yMax,zMax” then enter
9) Type “xMax,yMax,zMax” then enter
Create the lines:
10) Click on the create line button on the left hand tool bar 
11) Join up all the points to form a box
Create the surfaces:
12) Click on  from the left hand menu.
13) Surfaces can be created in 2 ways, either by clicking on the
lines that make up the surface and then hitting ESC, or automatically;
right click on the background and select Contextual -> Automatic
then type in ‘4’ and click ok. This creates surfaces
automatically when 4 connected lines are found. The surfaces should
now appear.
Create volumes:
14) Click on  from the left hand menu.
15) Again volumes can either be created by clicking on the surfaces
that make up the volume or automatically; right click on the background
and select Contextual -> Automatic struct.
Boundary Condition Assignment
For this simple example we want to assign an electrode and fixed
directors along the upper surface. The lower surface is ground and
also has fixed directors. The four sides have the Neumann condition
applied. Only one domain is present.
Select Problem type:
1) Data -> Problem type -> problem_type_LC2
Bring up the material dialog
2) Data -> Materials
3) Assign FixLC-2_Electrode-1 to the upper surface
4) Assign FixLC-1_Ground to the lower surface
5) Assign Neumann to the four sides
6) Assign Domain-1 to the volume
Periodic Conditions
Currently the periodic boundary condition has been fully tested,
and so its use is encouraged on the sides of the structure. The
Neumann condition for the potential has been verified for the potential
solution, but the surface integral required for the director has
not yet been implemented, so its use is NOT recommended if a change
in the director is expected in the plane of the boundary.
If periodic conditions are required a more complex procedure is
required in addition to setting the sides to Periodic in the Material
Dialog. A nodal equivalence scheme is used in the program, and so
it is advantageous to ensure that the same surface mesh is used
on the periodic faces. This requirement is not essential, and if
the meshes differ interpolation is used on one surface mesh to eliminate
nodes on the opposing side. If the meshes are significantly different
then the condition will not be properly applied.
To make the mesh the same on the two opposing surfaces where this
condition is applied. This is set using the instructions below.
1) Label all the points
2) View -> Label -> All in -> 
3) Deal with the first pair of conditions:
4) Geometry -> Create -> Contact -> Separated volume
5) Select the opposing faces on the x-axis
6) The program will pick a point on one of the surfaces and ask
for a point on the opposing surface to connect it to. A list of
possible points will be given.
7) Click or type in the number of the opposing point
8) Repeat for the faces on the y-axis
It is easy to make mistakes using this procedure for complex structures,
and it can be quite time consuming. Such mistakes give rise to elements
with zero volume, which will cause the simulation program to fail.
This problem can be checked using the following command:
Utilities -> Collapse -> Elements
Then select all elements and press ESC. A report given in the status
bar indicates if any elements or nodes were eliminated, and if this
is the case, then the Separated volume contacts have been improperly
created. It is necessary to delete the volumes and start again.
For complex structures this constraint can be overly restrictive,
causing the mesh generator to fail. My advice would be to avoid
create these contact volumes unless the surface mesh on opposing
surfaces is found to differ significantly.
Meshing
1) You must ensure a surface mesh is output in the mesh file:
2) Meshing -> Mesh criteria -> Mesh -> Surfaces
3) Draw a box around all surface and then press ESC
4) You can then create the mesh
5) Meshing -> Generate
6) You will be asked for the size of the elements to be generated,
it tries to make the element sides this long. Enter a suitable value.
7) It will give you a summary of the mesh, look at the number of
elements, see if this is enough.
8) When you click ok you will see a view of the mesh, if it is too
coarse, just click generate again and enter a smaller value.
9) This button toggles the mesh view on and off 
10) If you are happy with the mesh you can export it
11) File -> Import/Export -> Write mesh
12) Type in ‘mesh.txt’ as the filename, this is what
the modelling program expects
13) You can look at the surface mesh using:
14) File -> Postprocess
15) To get back to the normal mode use:
16) File -> Preprocess
This page last modified
2 June, 2006
by r.james
|